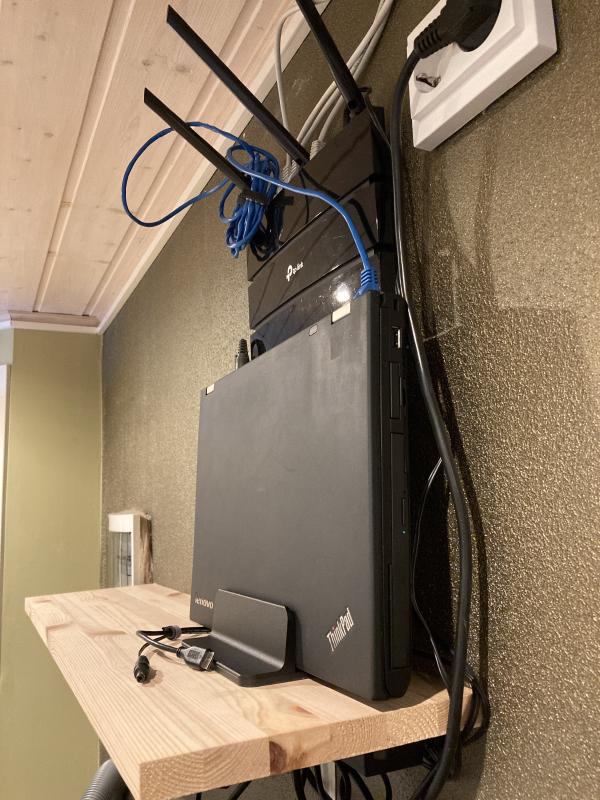
1. Ubuntu Server Installation
Download
- Download Ubuntu Server LTS here:
- Flash the ISO to a USB Stick using Balena Etcher or a disk imaging program of your choice:
1.1 BIOS Settings
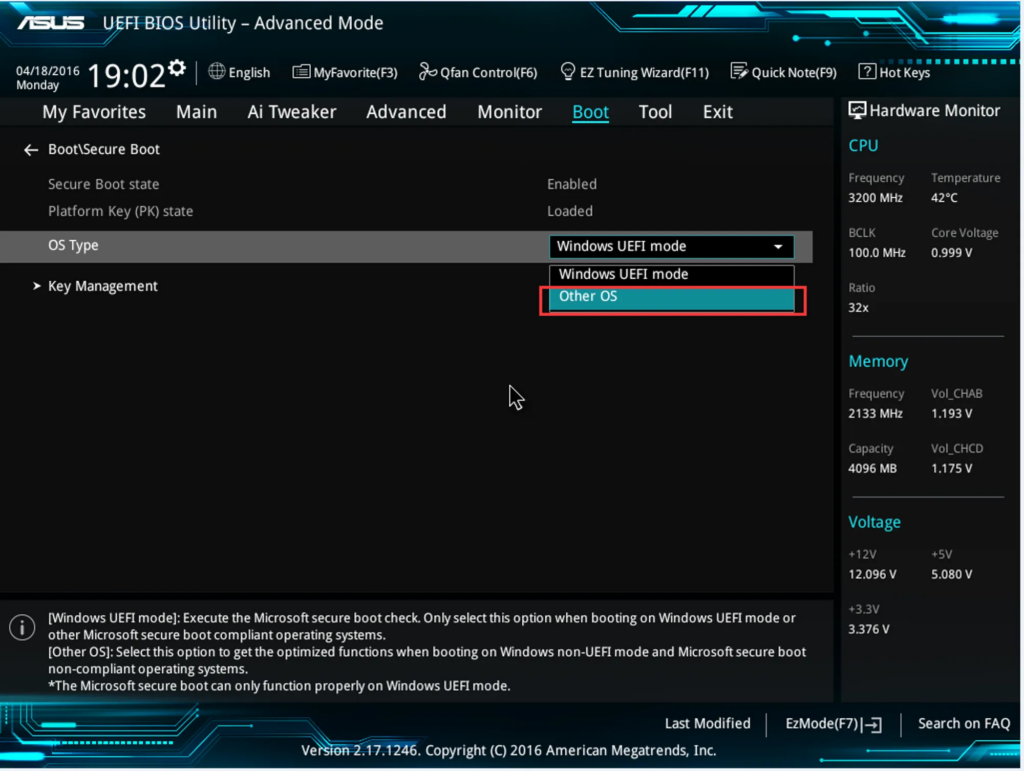
Plug the USB Stick into your machine and power it up. Head to the BIOS of your device and, if your device supports UEFI, ensure that Secure Boot is either disabled or your OS mode is set to Other OS. Most devices before 2010 do not have UEFI, so you can ignore this. Save and exit.
2. Installation
Boot from your USB stick by entering the Boot Selection Menu while your computer is starting up and select your Ubuntu USB. UEFI mode is preferred but not required. Once you see the GRUB boot menu, pick the first option to Try or Install Ubuntu Server.
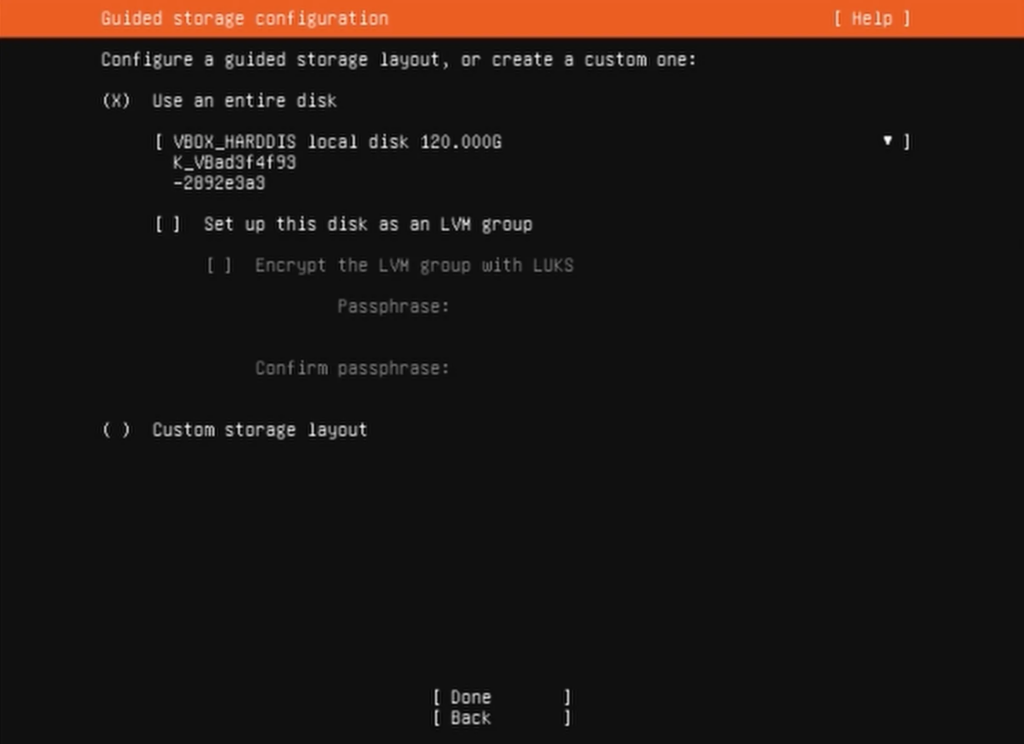
Follow the prompts on screen to install Ubuntu. Leave the OpenSSH Server checked to have remote access to your machine once it’s set up. Make sure you uncheck “Set up this drive as an LVM group” when asked about partitioning your drive. If you were to leave that checked, it would split your drive into multiple volumes, using only part of your disk, and you would need to manually resize it later, which complicates the process.
3. Accessing your server
Once the installation is complete, you will need to assign a static IP address for your computer on the network. This ensures that you always know what address your computer is on for connecting over SSH and will allow you to port forward services later.
It is recommended that you set this up on your router’s DHCP settings instead of assigning a static IP in your server’s network configuration. This will prevent future issues in case you need to upgrade or change your network, or if any devices happen to use the IP address that you manually set.
Set up is different for each router. Go to your router’s web interface and look at the Local Network and DHCP sections. You should find an option related to Static Leases. Find your server’s mac address, either through a menu or through the list of the connected devices, and set a static IP.
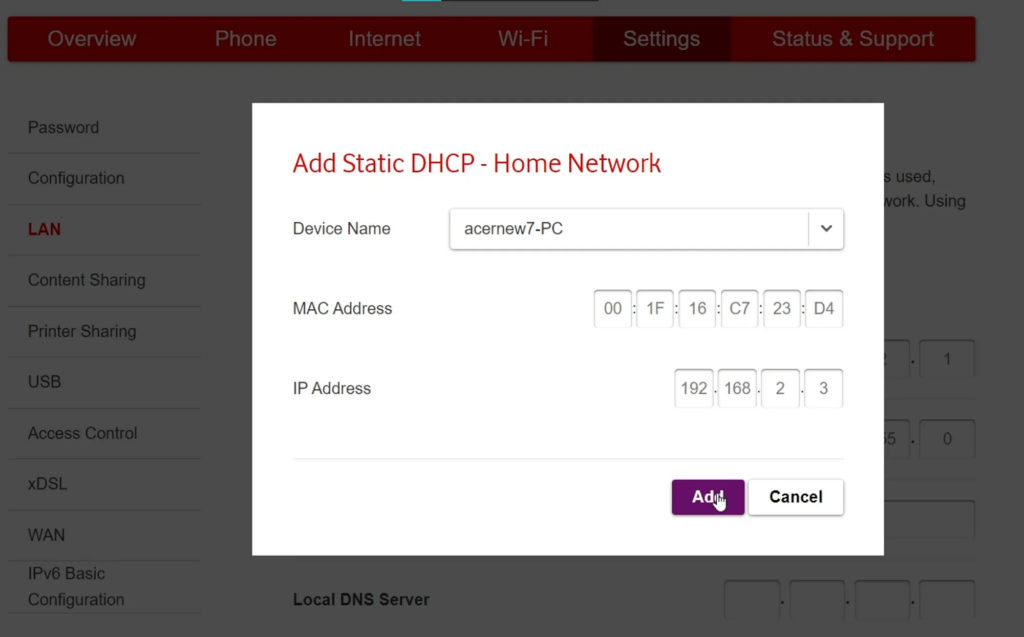
Once you’ve applied your changes, you may need to reconnect your machine to the Ethernet connection or restart it to get its new IP.
4. SSH Access
Once you have a static IP address for your machine, you can connect over SSH to run the commands in this guide remotely. Open a command prompt on your Windows, Mac or Linux computer and type:
ssh username@server_ipFor example, if your username on your server is Keshav and your IP is 192.168.2.3, this would be:
ssh Keshav@192.168.2.3Type in your password. Most password prompts for Linux utilities don’t show your password while you’re typing it, so just type it and press enter.
5. Disabling the sleep function when closing the lid (for laptops only)
Use nano to edit the file /etc/systemd/logind.conf.
sudo nano /etc/systemd/logind.confUse the arrow keys to find the line for HandleLidSwitch, uncomment it by removing the # in the front and change it to HandleLidSwitch=ignore. Your config should look something like this:
##... more lines ...##
#HandleHibernateKey=hibernate
HandleLidSwitch=ignore
#HandleLidSwitchExternalPower=suspend
##... more lines ...##
Save your changes by pressing Ctrl+X, then Y and Enter.
6. SMB – Samba
Samba is an open source implementation of the SMB profile, a Microsoft standard for accessing files over a network. SMB provides a native experience on Windows, almost like a USB Hard Drive, and has good support on macOS, Linux, iOS and through 3rd party apps on Android.
On your server, install the SMB daemon with the following command:
sudo apt install samba
Once that’s completed, you need a directory to store the files you will be sharing on the network. You may choose to create a folder in the /media/ directory. We will make the /media/myfiles folder for this guide.
sudo mkdir /media/myfilesSince this folder will likely be accessed by other utilities, like Jellyfin, it is best to give your user all permissions to avoid issues later on.
sudo chown $USER: /media/myfilesThe Samba configuration must be edited to show the folder. Edit it with sudo nano /etc/samba/smb.conf.
By default, Samba will treat any attempts to log in with the wrong credentials as a guest user. This can cause issues on Windows if you accidentally connect with the wrong password, since your shares will not appear. Change the line:
map to guest = bad userto
map to guest = neverAdd the folder you just created to the shares by adding these lines at the end of the file:
[myfiles]
  path = /media/myfiles
  writeable=yes
public=nomyfilesis your share name, and will be used when connecting over the networkpathis the folder shared from your serverwriteable=yesallows the creation and editing of filespublic=nohides the share if the user isn’t authenticated
Once that’s done, save the file by pressing Ctrl+X, then Y and Enter.
Lastly, run sudo smbpasswd -a youruser and set a password for Samba. This will be the password you’ll use on client machines to connect to the network storage. To restart Samba and make sure the changes go through, run sudo systemctl restart smbd.
7. Setting up Wireguard
Wireguard is a free and open source VPN. You may use Wireguard to access the devices on your home network from outside of your home network without having to port forward all of your services. This greatly increases your network’s security, as less services are exposed and there are less entry points for your network.
7.1 Dynamic DNS Setup
A DDNS is required if you need to find your home network and you don’t have a static IP address. Most ISPs don’t provide a static IP address or change your IP address periodically. If you don’t know if you have a static IP address, it is best to air on the side of caution and set up a DDNS regardless.
A DDNS is a service that gives you a hostname (a web address) that always points to your home network’s public IP address. There are many DDNS services, and any one of them would work, but we recommend DuckDNS as it’s free, permanent and quite user friendly.
Go to duckdns.org and sign in using your preferred method. Then, create a domain with any name that you like, as long as it isn’t already taken.
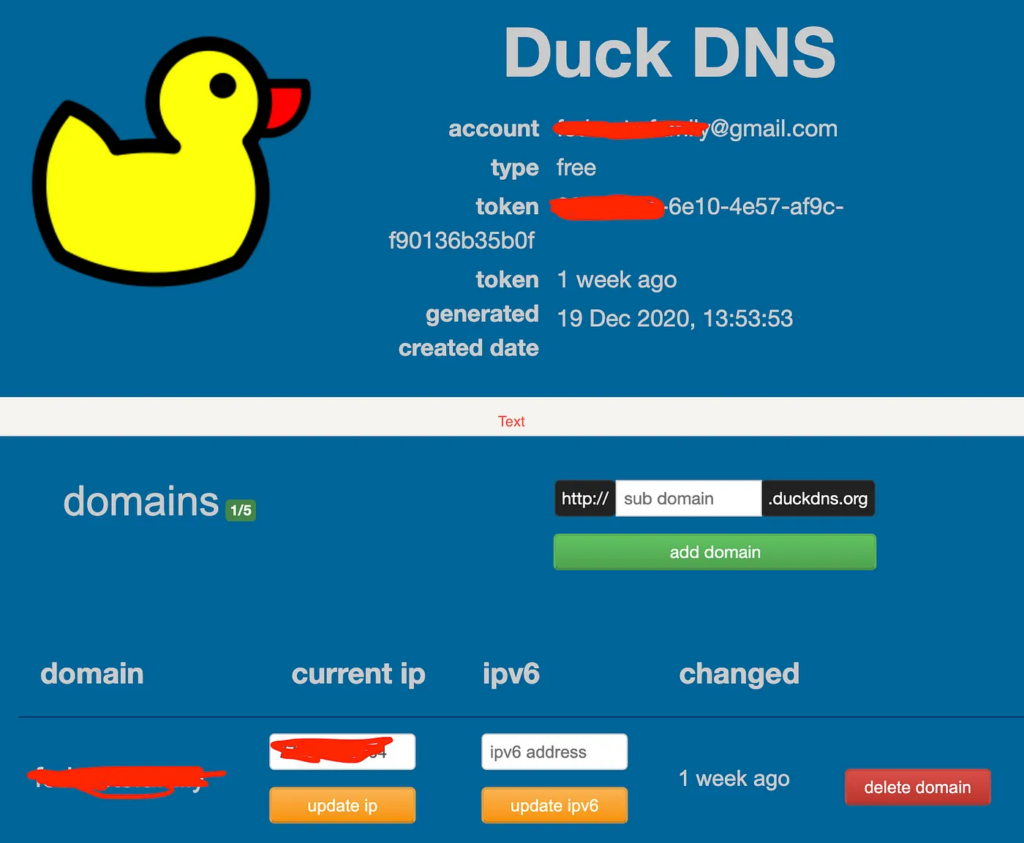
Then, click on install, go the the Linux Cron section, and follow the instructions you see on the page.

8. Port Forwarding
In order for Wireguard to work, you will need to forward port 51820 in your router’s web interface. This varies on each router, so you will have to find how to do it in your router specifically. Look for an Internet, Firewall, Security and Port Forwarding section. Make sure to select the IP of your server as the LAN IP Address, 51820 as the port on both WAN and LAN and use UDP as the protocol.
For more specific instructions, check if your router model is available on portforward.com.
If you’re having trouble port forwarding on your router, or the port forwarding isn’t working, consider this guide by u/brianatlarge discussing possible issues encountered while port forwarding: A guide to port forwarding
8.1 Install
To install Wireguard, you can use the PiVPN scripts. Although they are designed to run on Raspberry Pi OS, they also work on Ubuntu Server, as they are both based on Debian. Run
curl -L [<https://install.pivpn.io>](<https://install.pivpn.io/>) | bashand then, follow the prompts for Wireguard.
Don’t worry about the DHCP stuff in the installation, you’ve reserved your server’s local IP address in your router settings earlier. Leave the port as the default value, port 51820, which is the one we forwarded before. You can select any DNS provider you want, we’re going to scroll down to select CloudFlare. After this step is the important part – make sure to select “DNS Entry” instead of the IP address that shows up. Here, we’re going to input the DuckDNS address we made earlier. We also recommend enabling unattended upgrades, for extra security.
8.2 Setting up clients
Once you’ve rebooted your machine after installation, we’re going to run pivpn add and give a name to our client. It can be anything you want, really. Next, run pivpn -qr.
Now go on your phone or whatever other device you want, and open the Wireguard app. Add your configuration by scanning the QR code on your screen.
From this point on, you can turn on the toggle switch that connects to your home network, and route all your traffic through there. If you can see that both “Data Sent” and “Data Received” are going up, the connection works. This means you can use something like Swiftfin on your iPhone to enjoy your Jellyfin media from anywhere.
8.3 Local-only VPN
As an added bonus, we can create a second configuration that will only route calls to your local network’s IP addresses through your VPN. This way, you can enjoy the benefits of your home server without slowing down your connection every time you want to do something on it, as any calls to the internet will go through your normal connection instead of the VPN. Scan the same QR code as before, but give it a different name. You can call it something along the lines of “Local Only”. Then, edit the configuration.
In the “Allowed IPs” section, replace whatever is there with your local network address range, and add /24 at the end. For example, my local network addresses start with 192.168.68.X, so I’m going to input 192.168.68.0/24. Then, if you’re on an iPhone, scroll down to “On-demand activation”, enable both Cellular and Wi-Fi, and under the Wi-Fi section, exclude your home network’s SSID so that this configuration doesn’t activate when you’re at home. Now, you can keep this configuration open all the time, and access your home server as if it’s a part of the internet! If you have an Android device, you can also add a quick toggle to enable it whenever you want.
That it! You now have your home server ready.
